
Building a Chicken Tractor
So you’ve decided to take on the rewarding task of building a chicken tractor – a portable chicken coop that allows your flock to roam freely while keeping them safe.
In this article, we’ll walk you through the steps of constructing your very own chicken tractor, from choosing the right materials and design to ensuring the comfort and well-being of your feathered friends.
Get ready to embark on this exciting project that will provide your chickens with a cozy home and fresh eggs straight from your backyard!
Building a Chicken Tractor
Are you considering raising chickens in your backyard?
Building a chicken tractor can be a practical and efficient way to keep your feathered friends safe and happy.
Whether you’re a seasoned DIY enthusiast or a beginner with little to no experience, this comprehensive guide will walk you through the process of building a chicken tractor step by step.
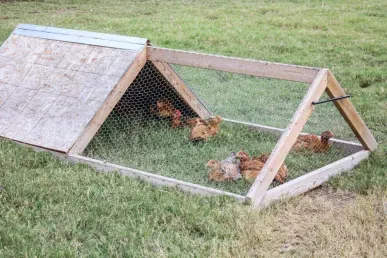
This image is property of www.weedemandreap.com.
1. Choosing the Location
Before you start constructing your chicken tractor, it’s important to consider the location where it will be placed.
You’ll want to choose an area that provides enough space for your chickens to roam freely and access to fresh grass and insects. Additionally, the location should have proper drainage and be easily accessible for you to care for your chickens.
2. Design Considerations
When designing your chicken tractor, there are a few key considerations to keep in mind. First, think about the size of your flock and ensure that your tractor will provide enough space for all of your chickens to comfortably move around.
The dimensions of your chicken tractor will largely depend on the number of chickens you plan to keep.
Next, consider the safety and security of your coop. Make sure your design incorporates sturdy materials and reliable hardware to keep predators out and your chickens safe.
Additionally, think about the ease of cleaning and maintenance. It’s important to have easy access to all areas of the tractor for cleaning, feeding, and collecting eggs.
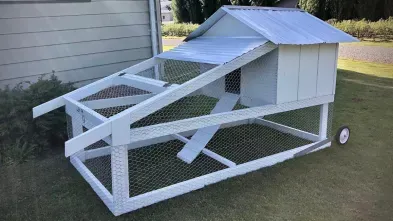
This image is property of i.ytimg.com.
3. Materials and Tools Needed
Now that you have a design in mind, it’s time to gather the materials and tools you’ll need for your chicken tractor project. For the frame of the tractor, you will need treated lumber or PVC pipes.
These materials provide durability while being lightweight and easy to work with. For the flooring, consider using plywood or wire mesh, depending on the type of terrain you will be placing the tractor on.
See also ICOFRU Solar Shed Lights Indoor Review
Additionally, you’ll need various types of screws and nails for construction, along with a drill, saw, hammer, and measuring tape. It’s important to have all the necessary tools on hand before you begin construction to ensure a smooth building process.
4. Constructing the Frame
The frame is the foundation of your chicken tractor, so it’s important to build it properly. If you’re using treated lumber, cut the pieces to the appropriate lengths according to your design specifications. Attach the pieces together using screws or nails, making sure to create a sturdy and stable structure.
If you’ve chosen PVC pipes for your frame, you’ll need to connect the pipes using elbow joints and T-joints. This will allow you to create the desired shape and size for your chicken tractor. Secure the joints with PVC glue to ensure they stay in place.

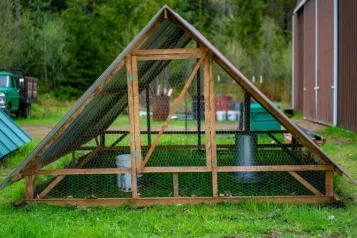
This image is property of 2.bp.blogspot.com.
5. Installing the Floor
Once the frame of your chicken tractor is complete, it’s time to install the flooring. If you’re using plywood, measure and cut it to fit the dimensions of the frame.
Attach it securely using screws or nails, making sure it is level and secure.
If you’ve opted for wire mesh flooring, you’ll need to measure and cut the mesh to fit the frame. Use zip ties or metal clips to secure the mesh to the frame, ensuring there are no gaps where your chickens could escape or predators could enter.
6. Building the Walls
Now that the floor is in place, it’s time to construct the walls of your chicken tractor.
Cut the pieces of lumber or PVC pipes to the appropriate lengths, according to your design. Attach them to the frame using screws or nails, ensuring a tight and secure fit.
If you want to provide additional protection from the elements, consider attaching weather-resistant material such as corrugated plastic or roofing shingles to the exterior of the walls. This will help keep your chickens dry and protected from rain and wind.
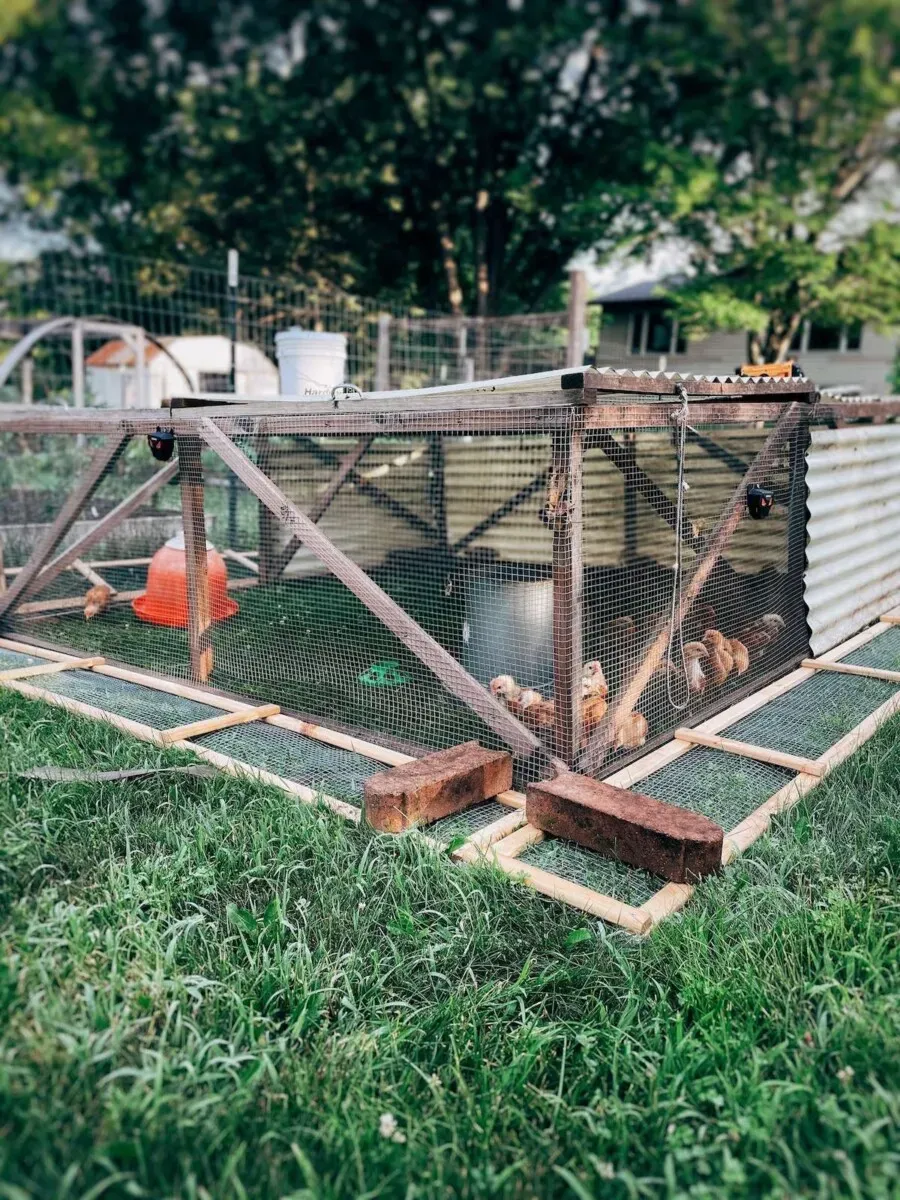
This image is property of homesteadingfamily.com.
7. Adding the Roof
The roof is an essential component of your chicken tractor, as it provides protection from the sun, rain, and other weather elements. Measure and cut the roofing material to fit the dimensions of your tractor’s frame. Attach it securely, making sure there are no gaps where water could leak in.
See also So What Are Amish Chicken Coops Really?
If you want to provide additional ventilation, consider adding a ridge vent along the peak of the roof. This will allow hot air to escape, keeping the interior of the tractor cool during the hot summer months.
8. Creating the Doors
To allow easy access to your chickens and their eggs, it’s important to incorporate doors into your chicken tractor design. Cut the pieces of lumber or PVC pipes to create the door frames, ensuring they are large enough for you to comfortably enter and exit.
Attach hinges and a latch to the door frames, allowing them to swing open and close securely. Make sure the doors fit snugly within the frame to prevent any gaps that could allow predators to enter.
This image is property of thehomesteadingrd.com.
9. Incorporating Windows and Ventilation
Proper ventilation is crucial for the health and well-being of your chickens.
Consider adding windows or vents to your chicken tractor design to ensure fresh air circulates throughout the coop. Cut openings in the walls or roof, and cover them with wire mesh to prevent predators from entering.
If desired, you can also install windows with plexiglass or other transparent material to allow natural light into the coop. This will create a more comfortable and welcoming environment for your chickens.
10. Finishing Touches
At this point, your chicken tractor is nearly complete. It’s time to add any finishing touches to make the coop more functional and aesthetically pleasing.
Consider adding nesting boxes for your chickens to lay their eggs, perches for them to roost on, and a feeder and waterer for easy access to food and water.
Additionally, you may want to paint or stain the exterior of the chicken tractor to protect the wood from weathering and add a touch of personalization.
Building a chicken tractor is an exciting and rewarding project that will provide a safe and comfortable home for your feathered friends.
By following these steps and using quality materials, you’ll be well on your way to creating a functional and attractive coop for your backyard chickens. Good luck with your construction, and enjoy the fulfillment of raising your own flock!