
Creating a Dust Bath Oasis for Happy Chickens
Chickens are not only delightful companions but also creatures with specific needs.
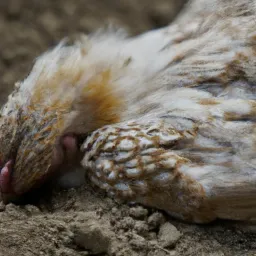
One of these needs is the ability to take dust baths, which helps them maintain good hygiene and keep pesky pests at bay.
In this article, we’ll explore the importance of dust baths for chickens and guide you through creating a dust bath oasis for your feathered friends
Why Do Chickens Need Dust Bath
Dust baths are an essential part of a chicken’s natural behavior. They help chickens clean their feathers, remove excess oil and parasites, and cool down during hot weather.
By providing your chickens with a dedicated dust bath area, you’re promoting their overall health and well-being.
Choosing the Right Location
Selecting an appropriate location for the dust bath is crucial. Ideally, it should be in a shady area, protected from wind and rain.
A coop or run is a great spot for a dust bath, as it allows easy access for your chickens while keeping the dust contained.
Materials for the Dust Bath
1. Sand: Play sand or coarse sand is an excellent choice for the base of the dust bath. It provides a fine texture that allows chickens to effectively clean their feathers.
2. Soil: Adding soil to the dust bath provides chickens with a variety of minerals and natural elements. Loamy soil or a mixture of clay and sand works well.
3. Wood Ash: Wood ash acts as a natural insect repellent and can help control mites and lice. Make sure the ash is from untreated wood and avoid using charcoal ashes.
4. Diatomaceous Earth: Diatomaceous earth is a powdery substance made from fossilized remains of diatoms. It is effective against external parasites and helps keep your chickens’ feathers healthy.
Creating the Dust Bath Area
1. Clear the area: Remove any debris or vegetation from the chosen spot. Ensure the area is level and free from sharp objects that could harm your chickens.
2. Dig the pit: Dig a shallow pit, approximately 12-18 inches in diameter and 6-8 inches deep. This will contain the dust bath materials and prevent them from scattering.
See also Should I Put a Chicken Feeder in the Coop or Run
3. Mix the materials: In a bucket or wheelbarrow, mix the sand, soil, wood ash, and diatomaceous earth. Aim for a well-blended mixture that’s easy for your chickens to dust themselves in.
4. Fill the pit: Fill the pit with the dust bath mixture, ensuring it’s evenly spread and level.
Encouraging Your Chickens to Use the Dust Bath
Chickens are naturally curious creatures, but they may need some encouragement to use their dust bath.
Here are a few tips to entice them:
1. Sprinkle treats: Initially, sprinkle some treats or dried herbs on the dust bath to attract your chickens’ attention.
2. Show them how: Gently guide a chicken into the dust bath, mimicking their dusting behavior. Your other chickens will likely follow suit.
3. Keep it clean: Regularly clean and replenish the dust bath to maintain its effectiveness. Remove any droppings or wet areas, and add fresh materials as needed.
Providing your chickens with a dust bath area is not only an essential part of their well-being but also a delightful way to observe their natural behavior.
By creating a dust bath oasis with sand, soil, wood ash, and diatomaceous earth, you’re helping your chickens stay clean, healthy, and happy.
Remember to monitor and maintain the dust bath regularly for optimal results.